The meeting room will auto-select a camera, microphone and speaker. If you use an external camera, microphone or speaker (Chrome only), it will normally select this one.
How do you change your microphone, speaker or camera?
Well that's pretty easy! Read how to change those below or watch this video:
Click on Settings at the bottom of the screen.
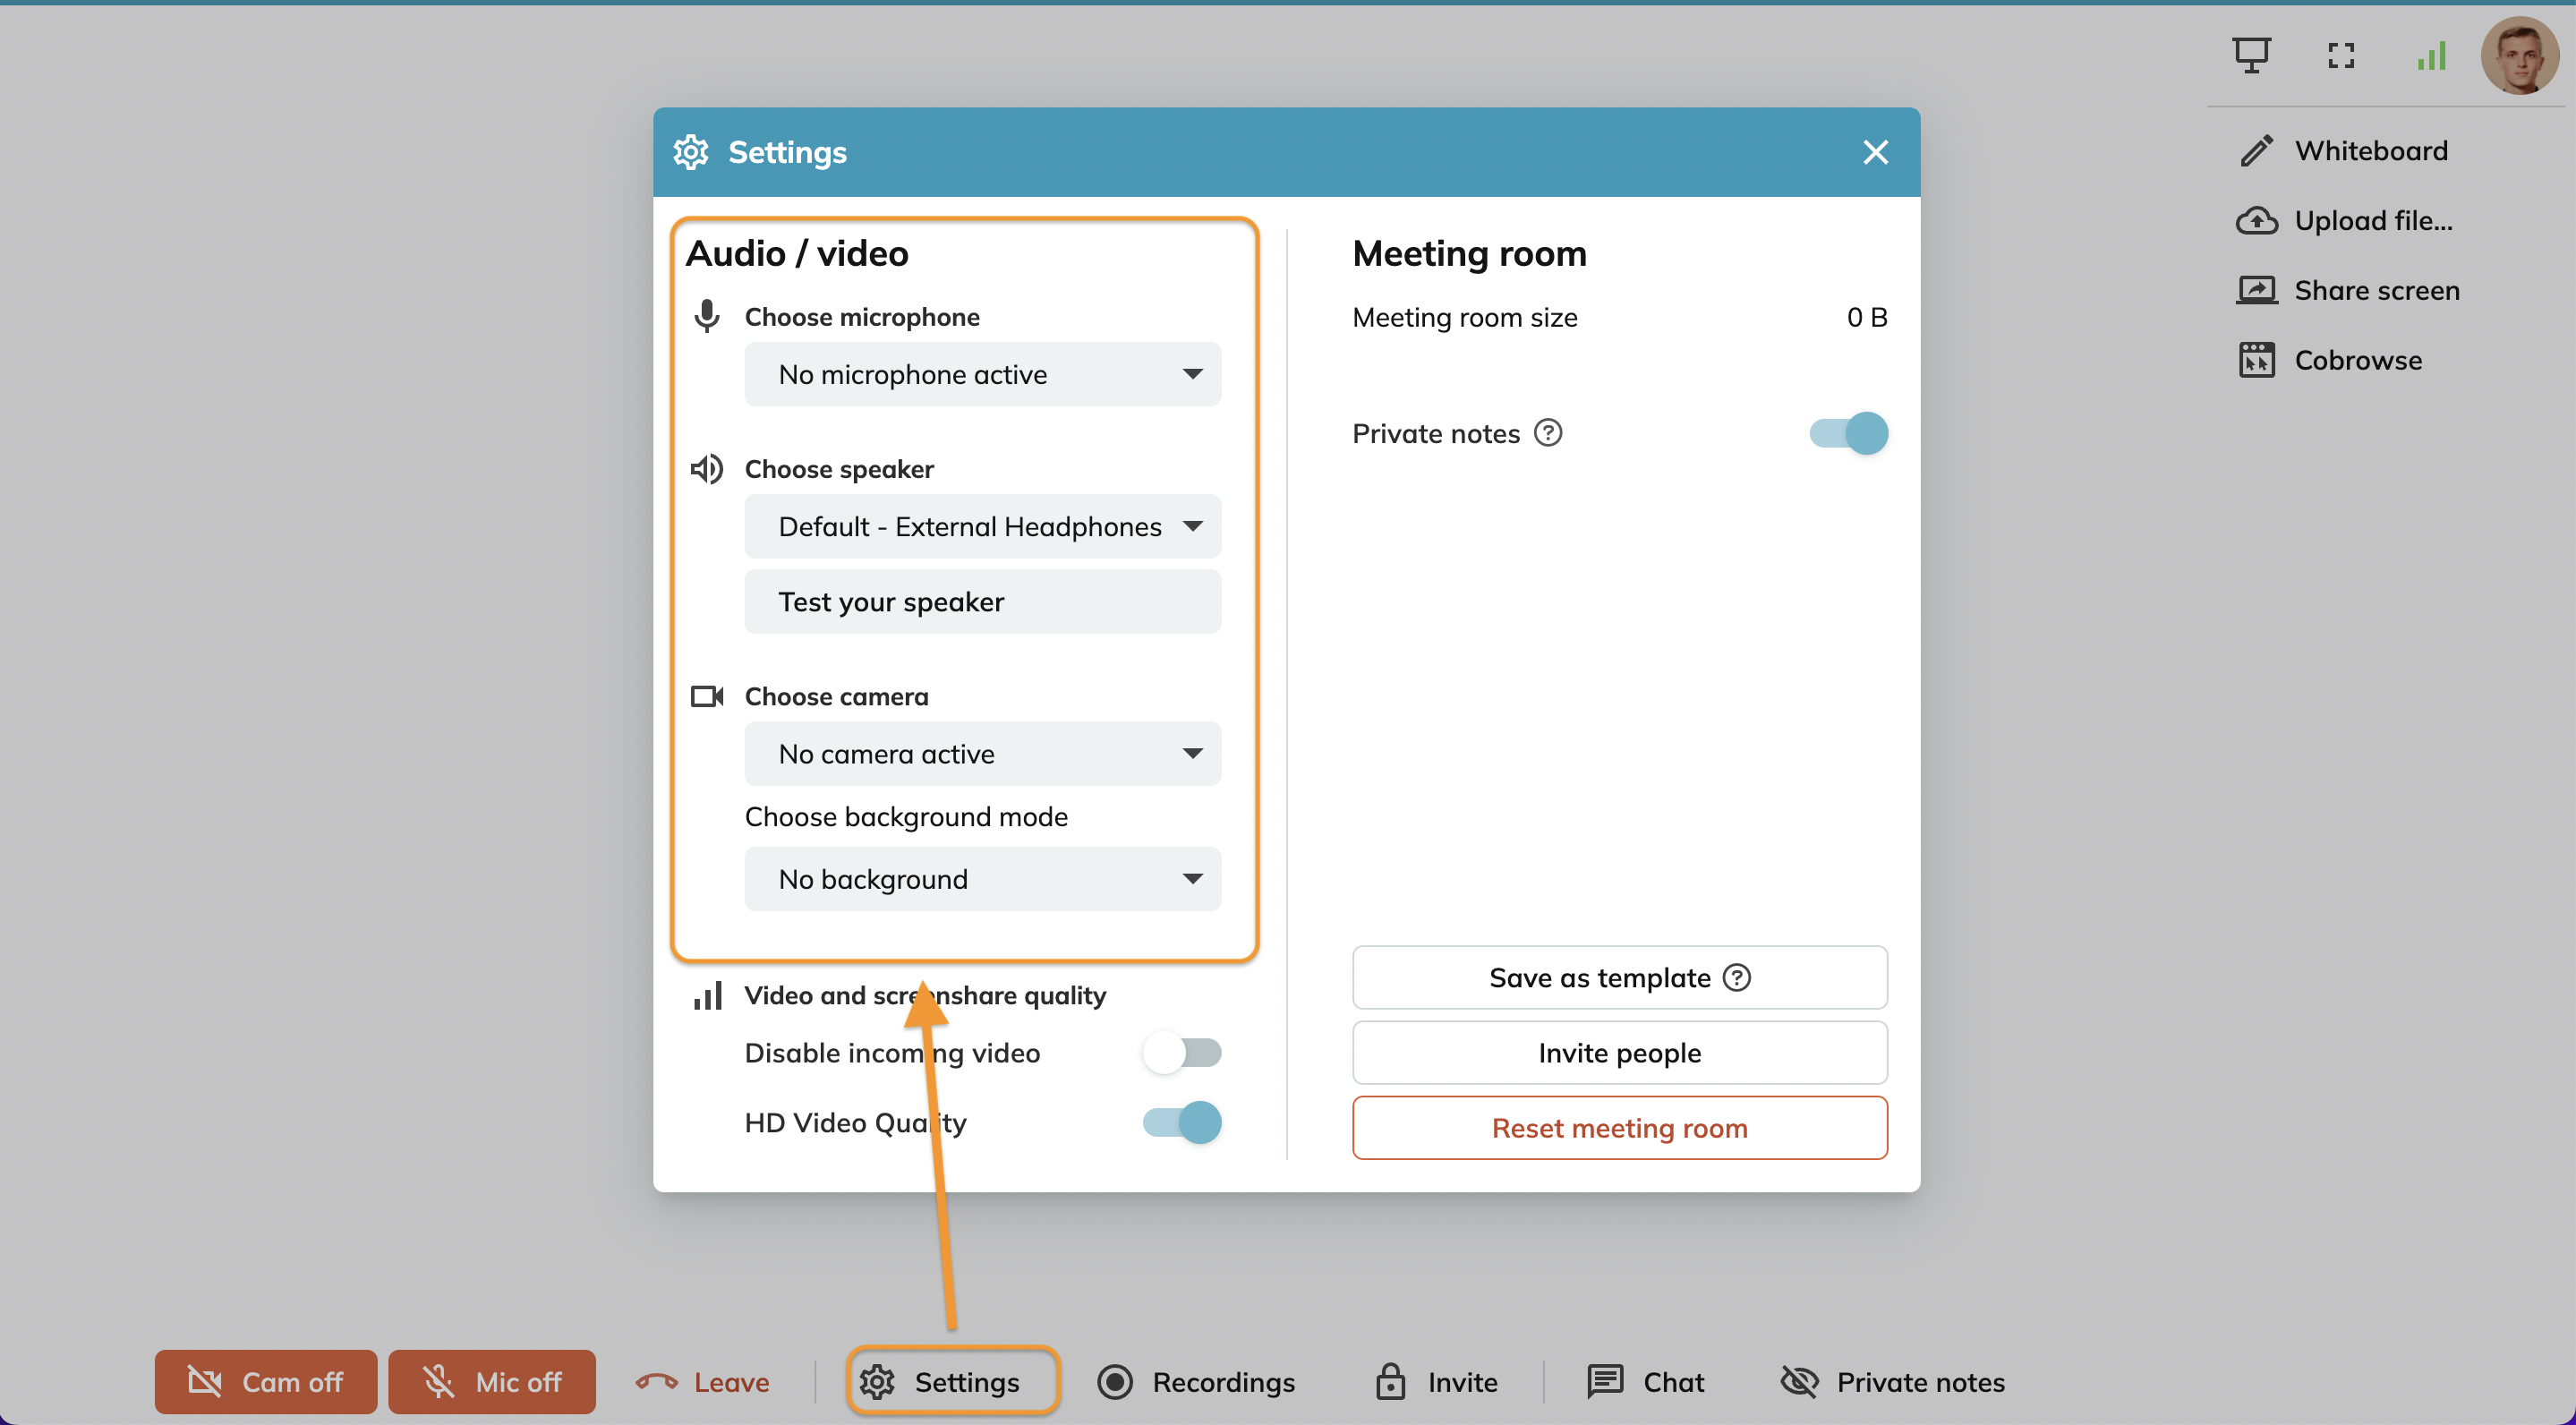
On the left side, you will see audio/video and be able to change the settings.
After you have changed you can always test if the new microphone/speaker works by clicking on 'test your mic/speaker':
Test your mic: you can speak and afterwards listen if the microphone picks up the sound. The bars will indicate how loud your voice/noise is.
Test your speaker: you will hear the 'guest wants to enter' tune. (only available in Chrome).
Camera: your camera will start. Make sure your 'video and screen share quality' (below the camera setting) isn't set on audio only!
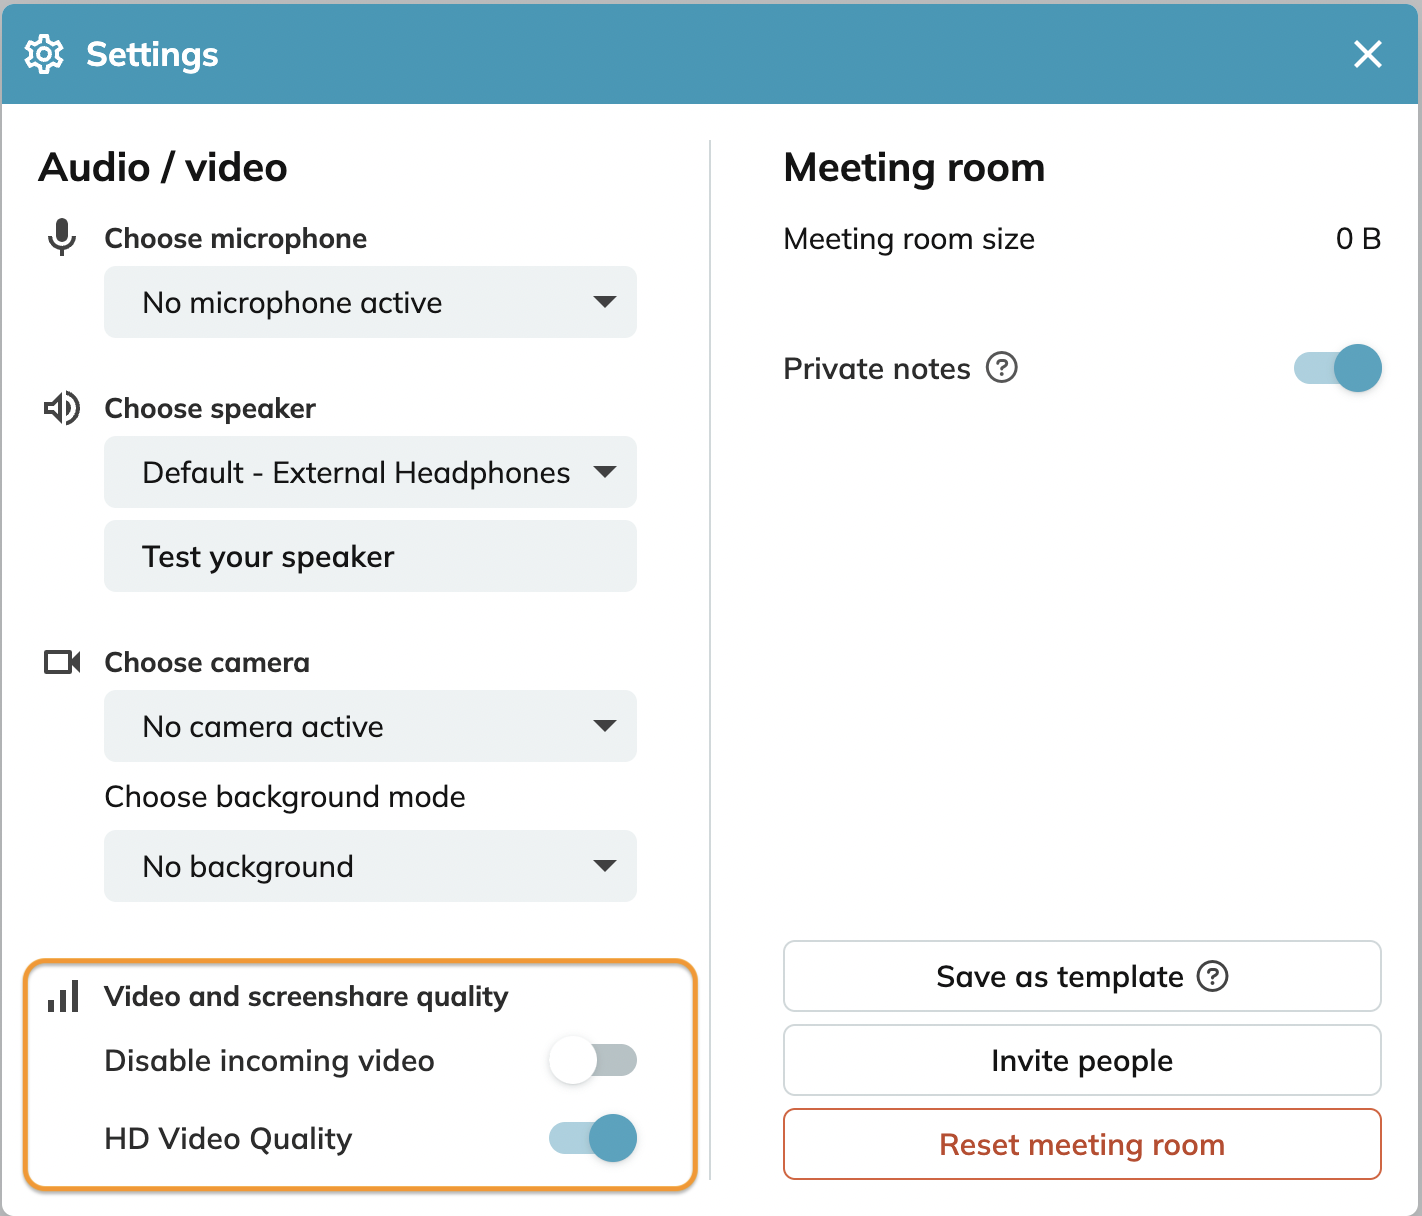
Improve and lower video quality
If you notice that there's a good connection between you and the customers, as a host you can change the video quality in the meeting room settings from standard to HD. Activate the slider HD Video Quality. This setting is only available for the meeting host and will apply to all participants.
If you or the customer notices a very bad connection it's a good idea to block the video streams. Therefore you can now Disable incoming video streams in the meeting rooms settings. Activate the slider Disable incoming video. This setting is available for all meeting participants and will only apply to whom has activated it.
Vectera is looking forward to your feedback so we can offer you the best scheduling and customer meeting experience. Set up your next customer meeting right away by logging into your account or sign-up for a free, fully-featured trial of Vectera!